Arts + Crafts · Crochet

My First Little Box of Crochet!!

So I took the plunge!! For the longest time I have wanted so badly to subscribe to the little box of crochet but always worried was it too expensive and was it for me?
I’m part of a crochet facebook group and some of the members would post and rave about this little box of wonders and I thought it was amazing but for nearly £20 a month… 🤔

So I left it for a while with my growing jealousy of seeing others showing off their boxes. 😂

But recently I have noticed subscription boxes have become such a fad! Their are a ridiculous amount of boxes out their for anything you can think of! Like seriously just google it… it is mental!!!
However I just thought let’s do it! What is the worst that can happen, I subscribe and then realise it isn’t for me and cancel? No harm done right?
So there I was excitedly typing “Little Box of Crochet” into google, clicking on the link to then read that they are changing their subscription! 🥺

Ok so maybe I am being a little dramatic 😇
.. basically up until June 2019 they where doing a monthly box filled with a little crochet goodies to make a small project for around £20 a month, this sounds amazing but from what I have read they had been doing this since their launch in 2015 and some had grown out of small projects I suppose and wanted something a little more.
With this the company decided to do a bi-monthly subscription so they could deliver larger projects for the same monthly price but of course it would be every other month instead. 
I was a little gutted I had literally just missed out of the monthly box but was still super excited to try it so I jumped straight on in and subscribed.

The subscription came to £18.95 a month which I thought was quite fair but I signed up at a bit of a funny time because of course with it being a bi-monthly box now I had just subscribed right in the middle!
This was an after thought and before I even really thought about contacting The Little Box of Crochet and enquiring about this I had already received an email from a lovely lady named Hazel! 
Super speedy contact which I absolutely love in business, it just shows they care in my opinion 😊
Hazel of course had already picked up on my bad timing and very kindly offered to send me out the first bi-monthly box from June if I would like to make another payment of £18.95 or I could put my payment towards my next months box.
There was not really a lot of thought put into this because of course I wanted the box from June!! Speedily I emailed her back and she sorted everything for me, truly amazing! 😁

Honestly I wasn’t expecting the box for quite some time but no joke it turned up about three days later!
I think the postman almost fell over at my excitement haha! But I couldn’t wait to rip open it and see what was inside!!
So without further ado this was the contents of my amazing (bigger)..

Little Box of Crochet ~ June 2019

The Box..

Oh my goodness!! This box is so damn beautiful like what on earth!!!!
The box was designed by Kayti Peschke and it is stunning! Inside is a small booklet that explains how the box is bigger but I of course have no reference to any of the previous sizes but in my opinion this box is a lovely size and I will most definitely be finding a use for it after! 
Upon opening the box everything is sealed up with a wrap of tissue paper and a darling sticker! This is so lovely, I am already in love with how much thought has been put into this box!

Welcome..

20190724_103512.jpg

With all seriousness I spent about 5 minutes carefully picking the sticker off of the tissue paper so as not to rip anything! 🤣
Don’t judge me! It was my first box and I wanted to preserve everything haha!

So when I finally got into the box.. 😄
I was greeted with this lovely booklet, on the front you can see a stunning image of the project that you are going to make with the materials in this box and inside you’ll be welcomed by Amanda Bloom, she talks a little about the direction she is taking the company and about all the exciting changes they have made/ are making before moving onto the contents of this months box. Also included in the booklet is information about designers and the pattern for the Summer Market Bag (of course). The pages have a lovely feel and are thick too which is great for someone like me who is always making notes on everything!

The Contents..20190724_104140.jpg

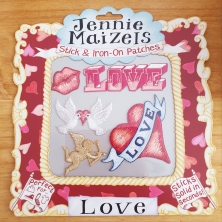
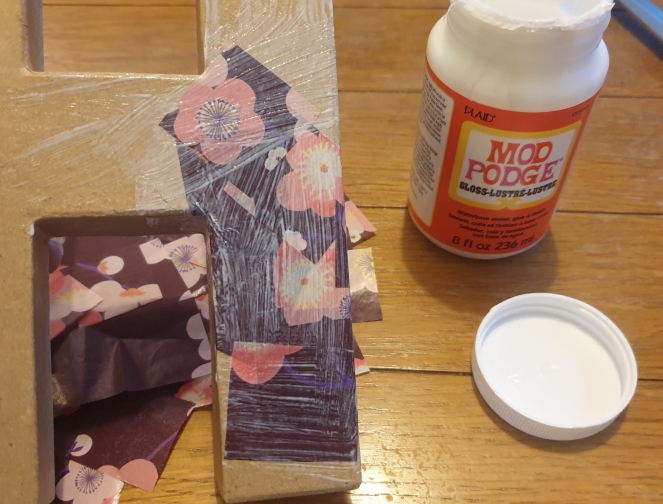
So after taking out the welcome booklet this was the next thing that I come to. 
Jennie Maizels Iron-On Patches, I think they are very cute although I have never really been a patch kind of girl. I don’t feel like this is through choice I just don’t feel like they are widely available in local shops and have definitely become more of an online deal. They are still super stunning but I am going to have to put some thought into how I want to use them because my first thought was I will buy a plain shopping bag and iron them all on their but come on! They deserve a little more thought and respect then that right 😊

20190724_103556.jpg

Next I am on to this postcard and matching notebook which are just AMAZING! They are everything! How cute are they!
Sorry, so many exclamation marks but come on! haha!
I feel like the postcards are a running thing and you can bet your sweet little tushy I am keeping every damn one of them! I will almost definitely be going out and buying a little scrapbook to keep them all in. Again stop judging me..

Notebooks are just my thing, I have about 50 million around my house, I will always find a use for them especially when crocheting, counting rows are not my dive.
This pair is amazing, beautifully illustrated & designed by Nicola Allan.

A few little leaflets where also in the box, one about a crochet book with a discount code and the other about a company called Seeknit who have some of there merchandise in the box.
Seeknit have included a some marking pins which I have never heard of or seen in crochet but regardless they look lovely and I will have to find a pattern and maybe do a little googling as to how you use them. And their is also a stunning 4.5mm bamboo hook, again I have never used wooden or more specifically bamboo hooks so I am very excited to try this out when making my Summer Market Bag and see what it is like to work with.

Next up we have some cute little Koru Clay Studio stitch markers, I know that there are always some stitch markers from Koru Clay Studios in these boxes but I have never had the pleasure of trying them so I am excited for that. And I have also seen in the booklet that they make a suggestion that you can use them as charms on your completed bag as they are colour complimentary, very well thought out may I just add!
Always included is a little bodkin needle with a felt ball which are of course always useful.
And a Tropical Palm Mini Travel Case. This is so dinky and cute! I am for sure keeping my stitch markers and bodkin in her because I am a nightmare for losing bits like that in the bottom of my bag! I love how it matches the box design too though!

20190724_104251.jpg

And finally!
The yarn!!!!!
Six 50g balls of cotton blend yarn from Yarn and Colours. I have never used any yarn from this company before but I love the cotton blend yarn for the Summer Market Bag project. And the colours are stunning! In shades pepper, orange, pesto and girly pink they look amazing together, I am so excited to start this bag!!

Sadly I have now reached the bottom of my box and although I wish it was like Mary Poppins bag I am so impressed by the contents of this stunning box!
This is definitely a win for me I am so SO pleased I decided to finally sign up for this subscription box and I am ridiculously excited for the August box. Entirely worth every penny!! ❤️

20190724_104400.jpg

I know I have waffled on for a bit through this post (which I apologise for 😁) but this was an amazing box, if you love crochet I couldn’t recommend it anymore highly.. you will love it!

And also if you have a moment there is a lovely section on their brand new gorgeous website about how Amanda Bloom started this wonderful adventure!
It is a truly saddened story (grab a tissue!) but how beautiful for something that was so awful for a family was turned into something amazing, it makes me smile to be reminded that there are people still like this in the world, such an incredible woman. ❤️

Thank you!

Hope you’re all having a great day,

Nicole 🙂 x

Arts + Crafts · Getting Crafty

Pouring the Ocean 🌊

I have wanted to do serious acrylic pouring for so long now that it just got to the point where I had to throw myself into it. Having said that though this is not my first acrylic pour.. my first acrylic pour was, well, quite dreadful! I won’t subject you to actually having to look at it but it was really bad and it did dishearten me for a while because it isn’t exactly a cheap art form either so I felt pretty crap for wasting all that money too.

Fortunately we were all asked to practice it at work not long after my rubbish attempt and I was shown how to mix the paint properly and what to use and it was quite different to how I had previously done it!!
And It actually didn’t turn out too bad!!


Hey I know it isn’t by any means perfect but i really like it and love the colours and there are even a few cells in there so I was over the moon about it! 🌝
That really helped to get my confidence back up though and now I felt like I knew what I was doing and thought I would give it another go!

I wanted to do a beachy kind of paint pour and thought I would do it on a large canvas as well because why not right?! 🙈

I went off skipping to the shops and gathered my supplies:
🎨 Liquitex Pouring Medium
🎨 Silicone Oil
🎨 Lolly sticks
🎨 Cups
🎨 Heating tool (not as hot as a blow torch but can’t be bothered to buy one from ebay just yet!)
🎨 A BUTT load of paint!
🎨 An RUB lid
🎨 Obviously a canvas!

I actually didn’t do this at my own house I convinced my partner to let me do it at his flat haha! But there I was with my supplies and I was so excited to do this!!

I’m rubbish with measurements but I added about 1cm of water and the same amount of pouring medium into a plastic cup and stirred it then gradually added my paint until it was all mixed evenly and I had a good “runny honey” consistency.
I did this with all my lovely colours and started to pour them into another clean cup together.
I poured each colour in, gently running it down the side as I didn’t want the colours to muddy.. I know you can pour the colours in from a height etc. for didn’t effects and techniques but I just wanted to be safe so went with the careful approach. 😁

BUT WAIT!!….

If you don’t know me all that well then you will soon learn that I am a doofus!! It is one of my biggest downfalls and I don’t know why my brain hates me sometimes .. 😞

So if you haven’t already worked it out… I forgot the damn silicone oil!!!

I didn’t add it to any of my colours and I was kicking myself so hard, at this point It was obviously too late so I tried dropping it in from a height to work it down through the paint I had already poured in the cup and dropped a few on top. Of course I quickly added it to the colours I hadn’t used yet as well and prayed I hadn’t messed it up already!!

I had all my colours (just about) ready now and was going to pour, yay!!
I thought I would do a dirty pour rather that a flip cup because I wanted the colours to stay somewhat separated across the canvas for the beachy effect I was going for.

I covered my canvas in white paint first because I’ve been told it helps the paint to spread with more ease other wise you can easily lose some of the effects when trying to run your painting.

I was so happy with the pour however I’m not sure how the blue got behind the yellow which annoyed me but oh well…

After I had tilted all the paint and my canvas was covered I put the heat tool on it but in all honesty I didn’t have much hope in the way of cells because I had messed up with the silicone and I couldn’t see any present but still gave it a go anyway.

20190720_204648.jpg

So I did poke it for a while because I wasn’t overly happy with it but did eventually leave it alone.
It took around 2 days to fully dry and then I sprayed it with a gloss finish.

Screenshot_20190829-145445_Instagram.jpg

So this is my finished piece, don’t get me wrong I do like it and I do genuinely think it looks like the ocean.. sort of but I suppose I just wanted more?
It did turn out to have a few cells in there and I do love the way the paint has rippled!!
Things that have annoyed me.. the blue went behind the yellow, i wanted more cells and myself.. for forgetting the silicone oil!! 😩

But then this is what it is about when you try something new.. it is all trial and error and learning from experience. You always have to allow room for error because otherwise you’ll never enjoy what you are doing, take everything you do with a pinch of salt!

(not literally though..)

Thanks for reading 😊

Nicole 💛

Just Talking

A Weary Traveller..

Hello! I’ve been a bit quite the last few days as I’ve been travelling to Bournemouth and back for this lovely promotion I’ve been given!

It was all very exciting and I had an amazing time, I learnt so much about the business I’m very proud to be a part of, I have to pinch myself sometimes!

Travelling by train was exhausting though, a lot of sitting and panicking that I was changing to the right train but it was totally worth it and I got to finish my book as well which was a brilliant read!
On the way back I had to cope on the London underground which was terrifying because not only was I alone, I had no mobile reception and it was my first time as well so I was a little terrified but I made it out alive thank goodness 😁 proud moment for me! haha!

The meeting itself though was brilliant, meeting the team, my fellow artisans and the CEO. We had the chance to learn more about the position we had accepted and what we will be involved in, it all sounds fantastic.
I’m so excited to be taking this journey as this is a brand new position they have just created and we are the pilots in a term. A lot of trial and error I believe is ahead but was that thing someone said about breaking a few eggs 😁🍳

After the meeting we made our way to a stunning hotel where we where all put up for the night, no joke it was incredible! I had an entire apartment to myself on the top floor over looking the river. And when we had all settled in we where taken for a walk down the river to a beautiful restaurant where I think we all stuffed our faces a little too much but it was incredible. I slept so well that night!! 😴

I’m so motivated now to push myself to make this work, I’ve already started planning a workshop to host in my local store. I’m going to start off with one of my super passions, crochet! 💖
However I wont reveal too much but I have quite a bit of planning to do so let’s hope some people turn up otherwise I’ll be ugly crying in the toilets for a while 😭🤣 but let’s hope it doesn’t get to that!

Along with planning workshops I’ve just enquired about a textile apprenticeship as well which has also just become available within the company so that’s all very exciting too.

And I’ve also just started a teepee inspiration too which is going to look fantastic when finished so I’m excited to share that with you all too.

But with all that being said I was ecstatic to be home and with my boys again, you don’t realise how much you miss them until you see their gorgeous little faces again and hold them in your arms! 💕
There where lots of hugs, kisses and maybe a few tears.. but no ugly crying thankfully!

Apart from that though I will be uploading some more crafts and things very soon as I have SO much to get on with but it is all exciting! 😊

Thank you for reading!

Nicole, The Little Artisan x

Arts + Crafts · Getting Crafty

Learning Wood Burning..

Hello again! So I’d like to share with you my pyrography art.. I made these a few weeks ago but thought I’d still like to share my work with you all so I hope you like them 😁

Some time ago I went into work to be greeted with a list of bits we could make and on there was pyrography. I hadn’t tried it before but have always wanted to so quickly scribbled my name next to it and grabbed some supplies from the store.

I was so excited to try this as I’ve always loved the way pyrography looks! I quickly got onto looking for an image I wanted to create and found a gorgeous mountain scene which worked perfectly with the wood slice I had chose to do my work on.
Thankfully I was also allowed to take a “practice piece” so I chose a wooden star just to have a play about with. My inner gamer came out in me with this one though as at the time I was not so patiently waiting for E3 to announce some news on my favourite games!!
20190710_100136.jpg

Pikachu & Isabelle!! So cute!! Granted it’s far from perfect but for my first go I didn’t think I had done too badly! 😄
At first I was getting so frustrated because when I usually draw or hold any implement in my hand I hold it a bit strangely and very closely to the tip. Of course you can’t do with this tool for obvious reasons.. I like my fingers looking pink and fleshy and not like sausages peeled off a BBQ. 🌭🙃

At one point i did get frustrated and I had to walk away and take 10 minutes to gain my enthusiasm for pyrography again. But I always do this, getting frustrated and pushing yourself to do something just ends in more mistakes more frustration and and ugly art project at the end! 🤣
So just walk away and get yourself together!! 😁

Coming back with a clearer mind I powered through and this definitely helped me to learn the way the pyrography tool handles, how I felt comfortable holding it and what pressures I should use. I did Isabelle first.. her hair got a bit burnt though 🤣
I accidentally tilted to the tool whilst curving and the side of the nib got too close to her hair tuft and left a mark oops!! But lesson learnt Haha!! The rest of it turned out well I thought though even if it was a bit rough around the edges!
I finished it off by adding a bit of colour using ordinary colouring pencils.

Now I felt good about using the tool and so sketched out my design onto the wood slice. The tool was easy to use at this point and I felt comfortable with the techniques and handling. When you get started it doesn’t take much time at all and ends up being thoroughly enjoyable for the most part.. especially the smell!! Mmmmm.. I started getting very nostalgic about bonfire night! 🔥😅

But after about an hour I had finished it and I am very proud!! Once again I added a little colour but only using a white pencil this time as I loved it looking quite simplistic.

20190506_141841.jpg

So hoorah for me!! I even made it through without burning myself as well!
This was challenging for me but I thoroughly enjoyed it and would highly recommend it to those who are curious about pyrography!!

Arts + Crafts · Getting Crafty

You say it like Cricket!!

I hope everyone had a great weekend, I’ve been busy as usual but it’s been a good busy for the most part!

I am excited to share some bits that have been made at my work over the weekend with the amazing Cricut machine!
I have issues with saying it properly though 😖 for some unknown reason I always want to say ‘cry-cut’ but hence the title of this post you don’t say it like that and I feel the scornful stare of those around me when I say it wrong. 😂🦗

However having said that I have some amazing stuff to share that has been made on the cricut explore air 2 machine, it is truly an incredible machine and you can do a ridiculous amount of crafts on it!
Lots of people think it’s only for paper craft but oh they couldn’t be more wrong! 😁

This was a bag made using the cricut machine. The air 2 cuts out the vinyl which you then simply iron on to the bag and it looks amazing!
I’m so excited to give this to my son’s teacher, she is truly an incredible person and I can’t thank her enough for everything she has done.. not only for my son but for being there for our family, she is one of those people in a million and I feel so lucky and blessed that she was his first teacher. Seriously thank you from the bottom of my heart.

Getting very emotional right now! 😭😂❤️

But moving on to the other item I want to show off.. 😊

This is a small scrapbook with a Belle vinyl, I’m absolutely in love with Beauty and the Beast and am completely crazy about this scrapbook!! Can you see the castle in her dress?! I can’t breathe!! 😂😱 
Again you simply use the cricut app to make your design and then the lovely machine cuts it out for you in a flash. This was made using a stick on vinyl and the finish it gorgeous!

I personally am very excited to learn more about the cricut explore air 2 as I’m not quite the whizz at it yet that I would like to be but I do plan on getting one very VERY soon so I can made more amazing items like these.

Arts + Crafts · Getting Crafty

Home Sweet Home

Last Christmas in the sales I bought some decoupage bits and thought I’d give it a go as I had never tried it before and it looked like quite a relaxing craft to try. So after a few hours of cutting a sticking I had created this adorable little reindeer and absolutely loved it!!
However the papers can be quite expensive especially if you want to have more than one pattern on your creation so this had put me off trying it for a while but recently I had a hankering to do it again and had a lovely idea to create the word “Home” with each letter decorated in different paper.
But I finally decided to stuck it up and buy the papers Haha!! 😂

A little tip if you are a beginner in decoupage you NEED a stiff brush, this is to ensure your beautiful paper doesn’t bubble and you get into every crease of your work. You can buy proper branded decoupage brushes but I already had a stiff brush so I made it work. 😊

Prepared!! I had my letters, my gorgeous papers, my brush and mod podge! I have never used the proper decoupage glue because the price of it is CRAZY but mod podge is just as good in my opinion.

The papers I chose did kind of have a theme to them.. I chose the purple for me as it’s girly and I am the only female in my household!! (Hard times!! 😖😂) The scaly blue one is for my boys as they love dragons and dinosaurs, giraffe pattern because they are my FAVOURITE animal and the map one because I’ve moved around a lot throughout my life and I have always told myself it doesn’t matter where you live it’s the people who are with you that makes a home. ❤️

We got a bit sentimental there 🤣 taking you swiftly back to the decoupaging though, I started with the H and chose the purple paper then began cutting it up into medium sized squares.. the beauty of this is they don’t have to be perfect!

Next I covered a small area of the H in mod podge with my stiff brush and just started placing the squares sealing them in place with a layer of mod podge on top.

The only thing I would say is try and think about how the pattern is being placed, so you want the pattern visible and the colours spread evenly so you get everything out of that gorgeous paper!

So for me I wanted all my flowers spread quite evenly, there where also a few orange flowers on the pattern which I tried to spread out too to make them pop against the others.
Apart from that though it is pretty much a rinse and repeat craft.. just keep on going until the whole thing is covered. It is so easy and anyone can do it!

I thoroughly enjoyed making my little decoupage letters and I know proudly have it displayed in my home to greet me as I walk through the door. 😍


Just Talking

Here we go again..

I am back, I am sorry for my absence but unfortunately life engulfs you sometimes and it is hard to fit everything in.

Lots has changed in such a short space and I won’t bore you with the details but the positives definitely out weigh the negatives and I am full of excitement for what the future holds!

If you are currently following my website or have visited before you may notice a lot has changed as I have completely wiped my website and changed it quite a bit.
But in all honesty I just wanted a clean slate and I feel so good for doing it, I have removed all of my gaming stuff but that isn’t to say I won’t be posting about it in the future I just have to prioritise at the moment and unfortunately gaming is going to have to take a back seat. 😔 

On a happier note though I have lots of things to share with you as I have been a busy little bee 🐝 so I will be posting lots of previous makes to catch you up on what I have been creating and I have a list as long as my arm for future makes! But it is all very exciting stuff and I would love to hear what you think about them so drop me a comment or message me through my contact page.

I’ve also very recently accepted a job offer at the company I currently work for which means that I will have so much more to share with you in the way of arts and crafts which is super exciting for me but I am not sure how much I can say about it currently so I will leave it at that but I hope you are all as excited for me as I am for myself!! 😁💖

I will leave this post short and sweet but I hope you all have a great day & you will be hearing from me super trooper soon!! 

The Little Artisan 💛